 |
UA Bundle SDK .NET
2.4.0.361
|
|
UA Bundle SDK .NET
2.4.0.361
|
This section contains information on how to use UaModeler for generating the information model used in the Getting Started lessons. Please refer to the documentation of UaModeler for more detailed information on using this tool.
First, we have to create the model shown in the Introduction in UaModeler.
Select File → New Project from the menu bar to start the New Project Wizard.
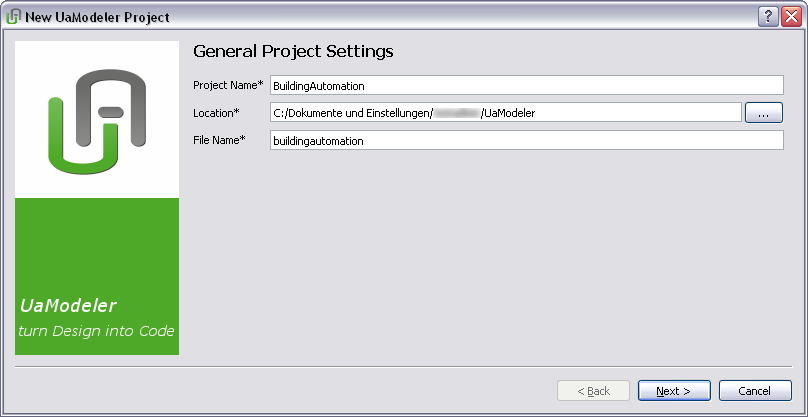
At “General Project Settings” enter the Project Name as shown in the screenshot below. At “Location” choose a directory for storing the project files. Confirm with “Next”.
Figure 2.4 General Project Settings Dialog
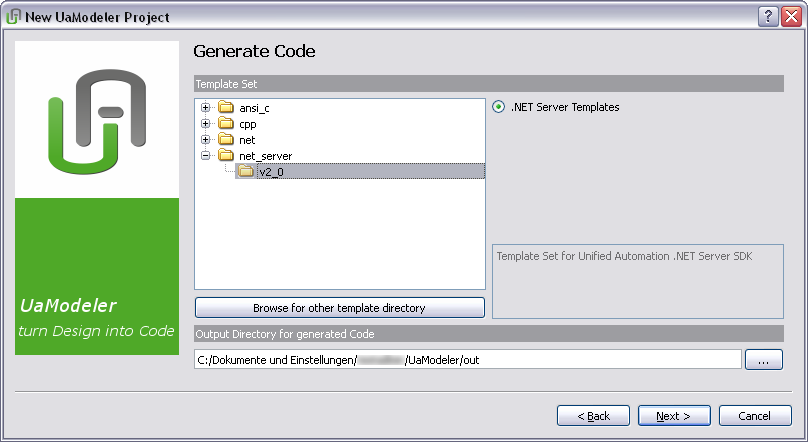
The “Generate Code” dialog will appear. At “Template Set”, select the .NET Server Templates. In addition, you have to specify an output directory for the generated code.
Figure 2.4 Generate Code Dialog
At the “Choose Base Models“ dialog, continue with default settings.
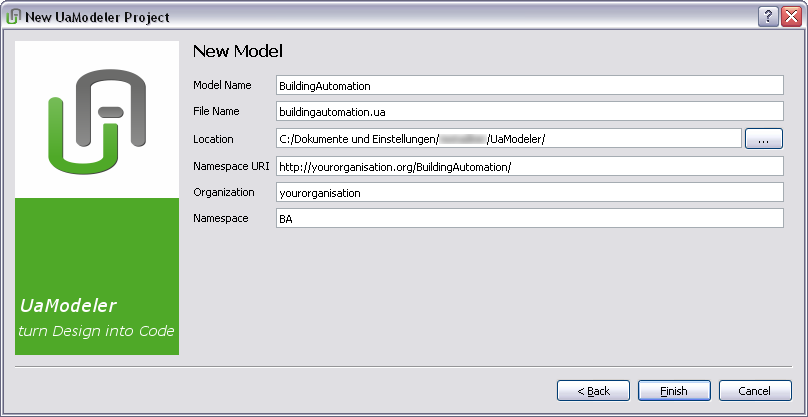
The new “New Model” dialog window will appear. Fill out the input fields as shown in the screenshot and finish the wizard.
Figure 2.5 New Model Dialog
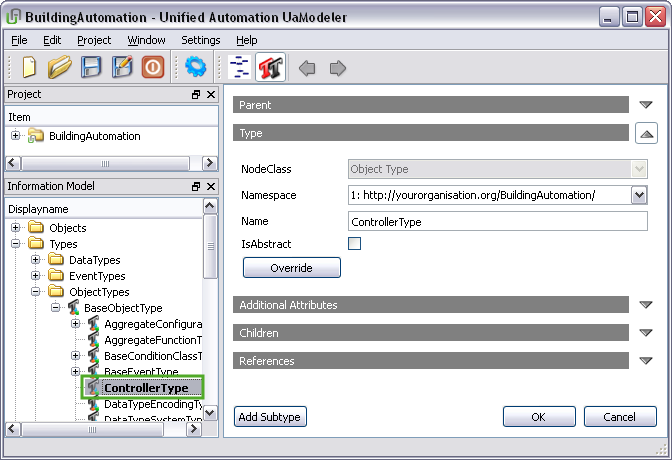
Browse to Types → ObjectTypes → BaseObjectType and add a subtype to BaseObjectType by pressing the button “AddSubtype” or by choosing “Add New Type” from the context menu. Enter the name “ControllerType” at “Type” and confirm with OK. The newly created Type should now show up in the Information Model window beneath BaseObjectType.
Figure 2.6 Adding ControllerType as Subtype of BaseObjectType
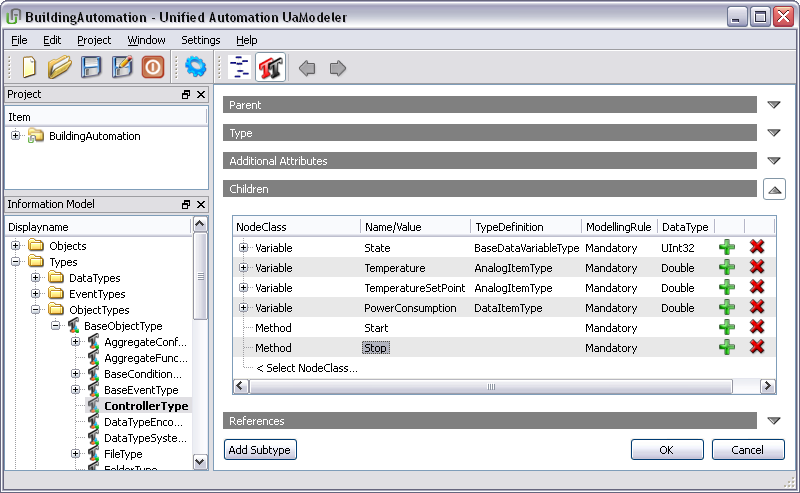
Expand the input field at “Children” and add the Variables and Methods shown in Figure 2.3.
Figure 2.7 Adding Variales and Methods to ControllerType
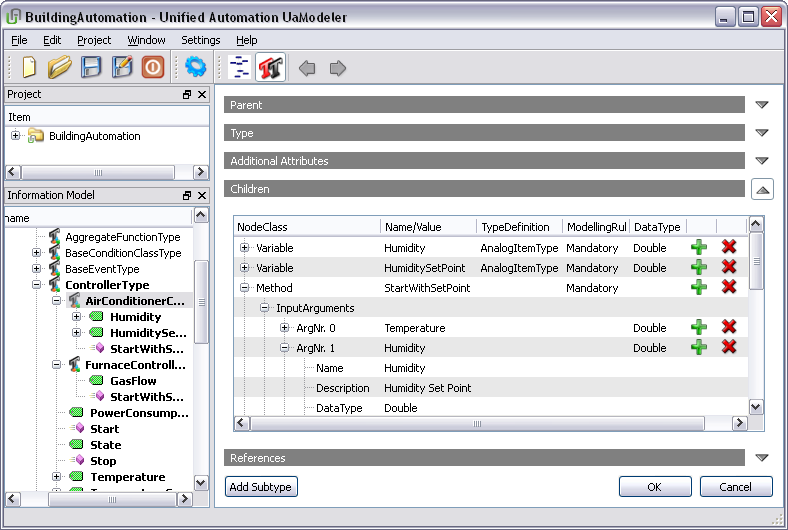
As a next step, add AirConditionerControllerType and FurnaceControllerType as Subtypes of ControllerType as shown in Figure 2.4, including Variables and Methods. To add input arguments, expand the method in the input field “Children” as shown in the following figure.
Figure 2.8 Adding Subtypes of ControllerType
Finally, add ControllerEventType as Subtype of BaseEventType, containing the children Temperature and State.
The complete infomation model is shown in Figure 2.9.
Figure 2.9 Information Model for Building Automation Example
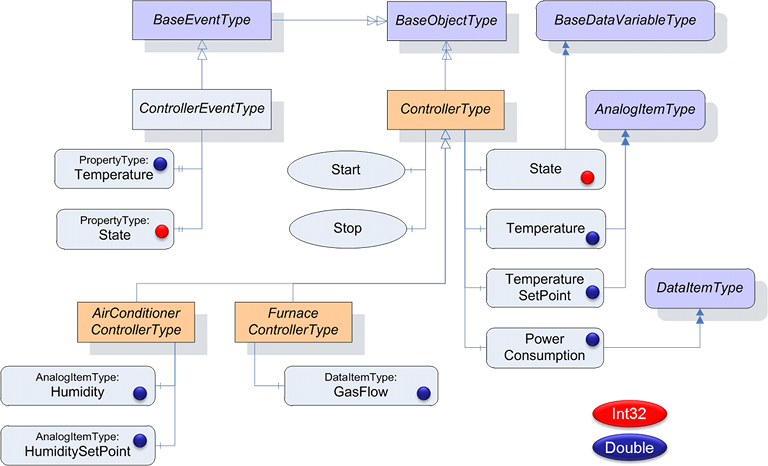
and Components"
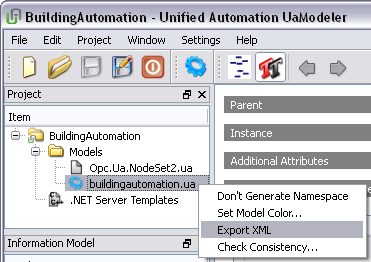
To export the previously created model, select “Export XML” from the model’s context menu in the Project Window as shown in the following screenshot.
Figure 2.10 Export Model as XML File
Finally, we generate source files by pressing the “Compile” button (the blue gear-wheel) in the menu bar. The model XML file (buildingautomation.xml) can be found in the project folder, the generated source code file (BAIdentifiers.cs) is located in the output directory specified above.
Next step: Integrating the Model into an Empty Server

