 |
UaModeler
1.6.3.454
|
|
UaModeler
1.6.3.454
|
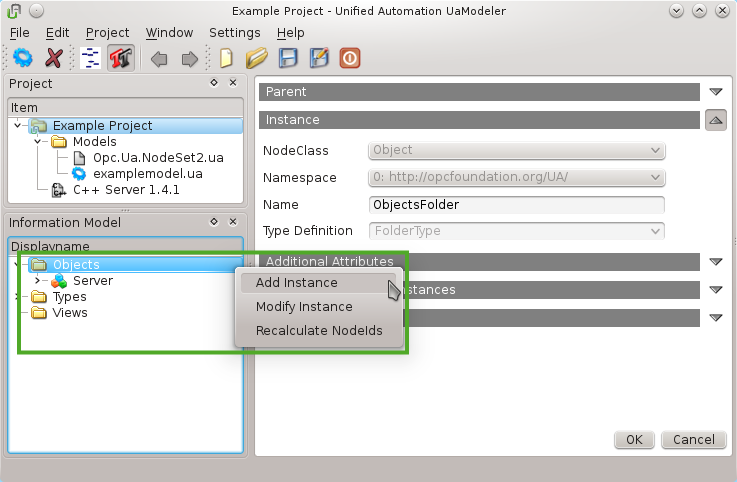
You can create instances of any ObjectType and VariableType by using the context menu of in the Information Model Window. The selected node must be the Objects folder or must be hierarchically referenced by this node.
For instace, to add an instance of MyObjectType created in the HowTos for ANSI C, C++ and .NET, select the Objects folder in the Information Model Window and choose Add Instance from the context menu (see screenshot).
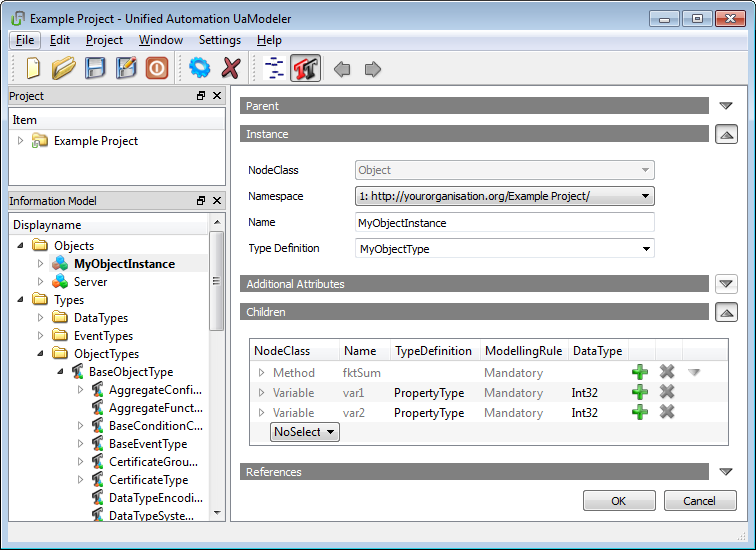
Fill in the name of the instance (in our example MyObjectInstance) and choose MyObjectType as Type Definition (see screenshot) and confirm with OK. The new Object instance now shows up in the Information Model Window.
Another way to add instances is modifying the parent node of the instance, i.e. the node that should become the parent of the new instance (see Modify an Instance).
You can choose the node class of the instance with the NodeClass drop down box. There is Object and Variable available, if the parent is an Object. If the parent is a Variable, you can only add Variables.
The following code snippet shows how to access data values of the instance created above when using the C++ SDK (servermain.cpp of the Server Hello World example is used as shown in HowTo (Linux): Compile the Generated Method Project Files and HowTo (Windows): Compile the Generated Method Project Files):
By selecting the type definition all mandatory children of the selected type will be added to the Children view. For these children you can change the type definition and for variables the data type. Here you can only choose subtypes of the preselected type definitions and data types.
Like described previously for ObjectTypes and VariableTypes, you can add additional children and references (see Children of a Type). Similar to the Children tab for adding ObjectTypes you can clone the current child by clicking the green “+” and remove the current child by clicking the red “x”. For mandatoty children, that are defined by the type definition node, the red “x” is disabled.
By clicking OK the instance and its children will be added.
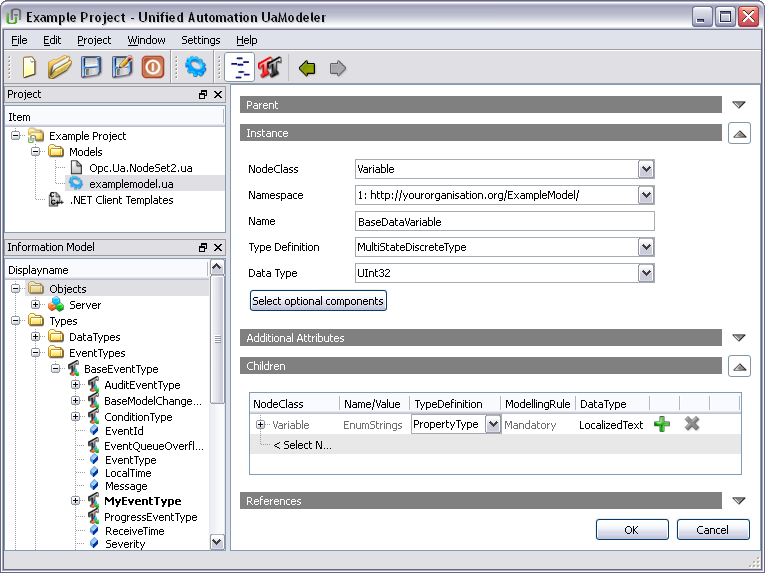
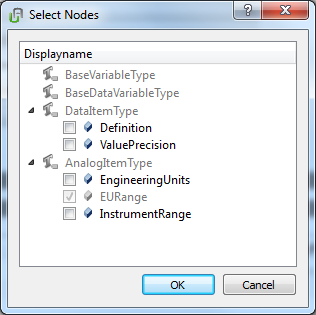
If the selected TypeDefinition node has InstanceDeclaration nodes with the modelling rule “Optional” the button “Select Optional Components” is shown in the Instance tab. After clicking this button a dialog pops up where you can select optional children.
You can modify any user defined instance node by using the context menu of a node in the Information Model Window or by selecting the node while in Types View. In the same way nodes are added you can modify them (see Add an Instance).
UaModeler provides the feature to propagate the NodeId of a node to its children by choosing “Recalculate NodeIds” from the context menu of an instance.
Example:
The NodeId of MyObjectInstance created in Add an Instance is numeric by default. To test the feature, we’re changing the NodeId to String with the identifier MyObjectInstance. Then we’re changing the NodeId of var1 to String with the identifier var1. Now select the instance node again and choose “Recalculate NodeIds” from the context menu. Now all children will have string NodeIs, and the identifier of the child var1 has changed to MyObjectInstance.var1.
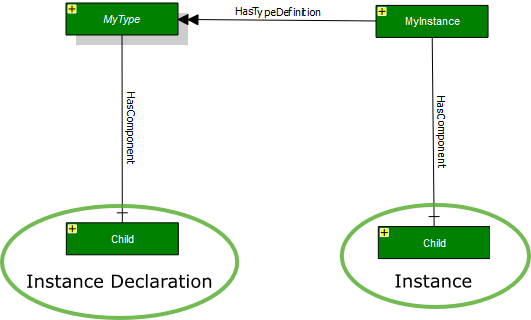
If the instance has a similar node, i.e. the instance is defined by an instance declaration, like shown in the following figure (for more information refer to the OPC UA Specification, Part 3, pp. 41/42), you cannot modify all attributes. In this case, the respective options are disabled (see Instances).
You can modify children in the same way you have added them. By clicking the green “+” the node and all children are copied. By clicking the red “x” the node and its children are removed.
Note that you can easily add a big amount of nodes to your model. If the total number of nodes you add is higher than 5000 the speed of the UaModeler will get significantly slower. If you want to create very big adress spaces, it is better to do this in the generated code using a loop.
You can delete an instance using the context menu of the Information Model window. Another way of deleting an instance is to modify the parent and click the red “x” for the node. If the instance is a mandatory child of another node you cannot delete it. All hierarchically referenced nodes will be deleted with the instance.