 |
UaModeler
1.4.2.342
|
 |
UaModeler
1.4.2.342
|
Before working with UaModeler, you have to create a project. This is described step-by-step in the section HowTo and Short Tutorial.
By default, project files are saved to the user’s home directory and contain the extension tt2pro. To load an existing project file, choose File → Open… from the menu or click on the yellow folder icon.
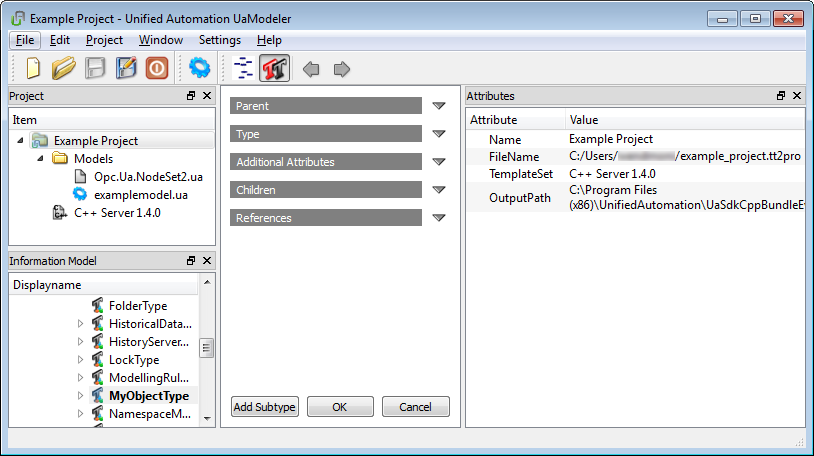
A graphical representation of the current project is shown in the Project Window. The screenshot below shows the project created in the HowTo (Windows): Create a New Project With a Method. The top node represents the Project itself, beneath it you can find a folder containing the models which have been added to the project and the template set which has been chosen when creating the project.

When selecting one of these nodes in the project window, some associated information is displayed in the Attributes Window.
When selecting the project node, the Attributes Window shows general project related information.
To edit these settings, choose Project → Project Settings… from the menu.
This folder contains all Models which have been added to the project.
For each new project, it is necessary to create a project specific model, which will be stored in a separate file (in our case examplemodel.ua. The standard OPC UA Server model as defined in the OPC UA Specification is added automatically.
The blue gear wheel symbol in front of a model node indicates that this model is selected for generating code for this model namespace.
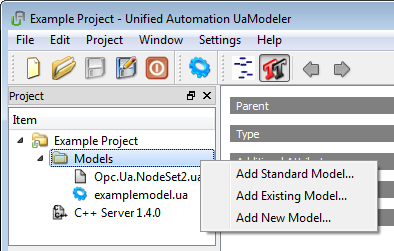
Right-clicking on the Models folder opens a context menu providing the following options.

When selecting a model in the Project Window, the following information is displayed in the Attributes Window, regardless of the template set which has been chosen.
There may be additional attributes (Namespace, Organisation …) which depend on the Template Set.
The following settings can be reached via the context menu:
The following information is displayed in the attributes window regardless of the template set which has been chosen
All other information depends on the template set.