- Note
- The windows described in the following sections are empty when starting UaModeler for the first time. It might be useful to create a project before reading ahead. These HowTos contain step-by-step descriptions on how to create a project to generate code which can be used with a certain Unified Automation SDK. For more HowTos see HowTo and Short Tutorial.
Overview
This section will explain the most important windows and buttons of the UaModeler. Though the UaModeler is more powerful, this short description will be sufficient to understand the UaModeler’s main function. Furthermore, you can access descriptions of each GUI element by the menu entry Help → What’s this.
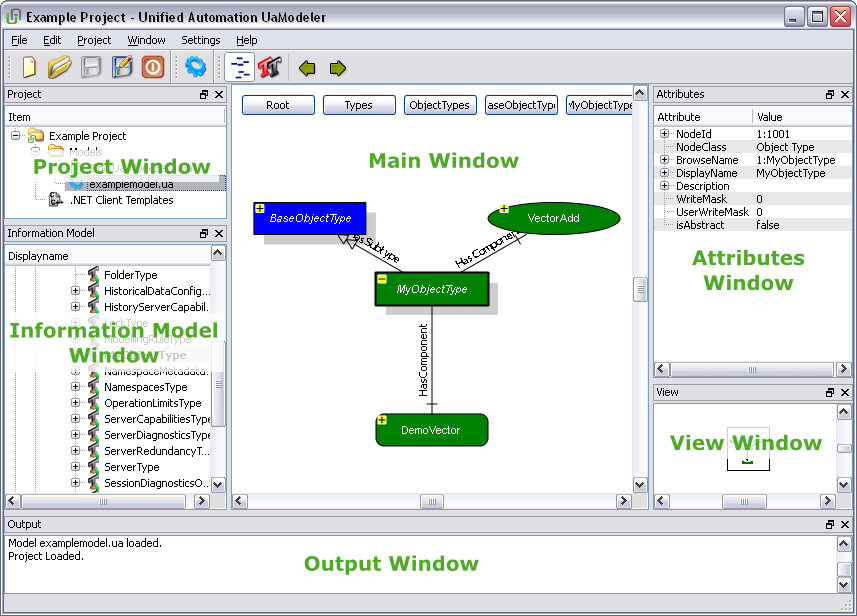
The following screenshot gives an overview of the different windows of the UaModeler’s GUI, which are described below.
Main Window
This window can contain two different kinds of view for the current information model.
- Types View
- This view contains the information of the selected node of the Information Model Window. You can modify the selected node directly. See Browsing Models for more information.
- Graphics View
- This view contains graphical representations of the designed model including references. You cannot do any modeling within this view. See Edit Models for further information.
You can switch between these views by clicking the corresponding buttons in the tool bar or using the short cuts Ctrl+M and Ctrl+T.
The Menu Bar
The menu bar itself contains six main entries which will now be described in the following:
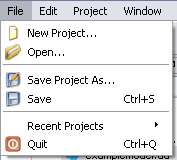
File
- New Project
- Here you can create a new project for generating code. More information on creating a project can be found on the HowTo pages.
- Open
- Use this menu entry to open an existing project.
- Save Project As
- If you want to rename your project (or save a backup copy) you can save your work in a new file.
- Save
- Click here to save your project.
- Recent Projects
- This menu entry shows a list of the last opened projects.
- Quit
- Clicking on this entry will quit the whole application.
Edit
- Find Node
- Here you can find some elements (e.g. different nodes).
- Apply Type Changes to Instances
- If Instances are no longer congruent to their TypeDefinitions (e.g. mandatory children are missing) the congruency will get restored. This feature can be very useful for models that are based on other models that have changed.
- Remove unreferenced nodes
- All nodes that are not hierarchically referenced by the Root node will get deleted.
- Find unreferenced nodes
- All nodes that are not hierarchically referenced by the Root node will be displayed in the Output window.
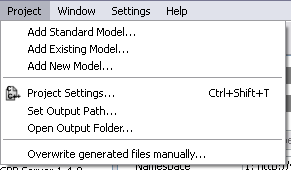
Project
- Add Standard Model
- Here you can add base models (which are delivered with the UaModeler) to your current project.
- Add Existing Model
- Here you can add an existing custom model to your current project.
- Add New Model
- Here you can add a new custum model to your current project.
- Project Settings
- Choose this entry to open a dialog for selecting a different TemplateSet.
- Set Output Path
- Here you can change output path for the generated files.
- Open Output Folder
- Choosing this entry opens the output folder in a file manager window.
- Overwrite generated files manually
- When the UaModeler is set to not overwrite some or all files when generating code, you can use this dialog window to manually select files which should be overwritten. See Edit Settings for more information.
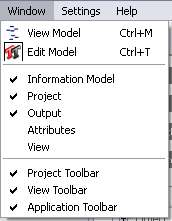
Window
- View Model
- Here you can switch to the Graphics View to display your model.
- Edit Model
- Choose this menu entry to switch to the Types View and edit your model.
- Information Model, Project, Output, Attributes, View, Project Toolbar, View Toolbar and Application Toolbar
- By checking/unchecking an entry it is possible to activate/deactivate the view of the corresponding window or toolbar in the application window.
Settings
- Edit Settings
- Here you can enable/disable the editing of NodeIds and add author information (see Edit Settings for more information).
- Select Namespaces for TreeView
- Choose this option to open a dialog to select which namespaces to show in the treeview. Further information can be found under Show/Hide Models.
- Select NodeIds for new nodes
- Select this entry to modify the starting NodeIds for automatic creation of NodeIds. This is described more detailed in the section Setting the NodeId Range.
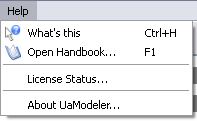
Help
- What’s this
- By choosing this menu entry, the mouse pointer behavior changes to indicate regions in the GUI for which tool tips are available and to display them at clicking.
- Open Handbook
- Click here to open this documentation in a browser window.
- LicenseStatus
- Choose this entry to open a dialog window which shows if you have a valid license for UaModeler or not.
- About UaModeler
- Here you can find a short description about Unified Automation and the third-party libraries in this software.
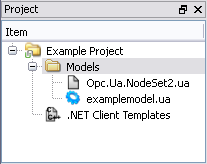
Project Window
This window shows the loaded models and kind of code that will be generated. In the Project Window you can select the models that will generate code via the context menu of the model's node. It is blocked to generate code for the standard models because the Unified Automation SDKs already provide code for these nodes.
Via the context menu of the model nodes you can also save the model in XML format of the OPC Foundation (http://opcfoundation.org/UA/2011/03/UANodeSet.xsd). For the eval version this functionality is limited to a small number of instances and types. You can also call the ConstencyCheck (see Consistency Check).
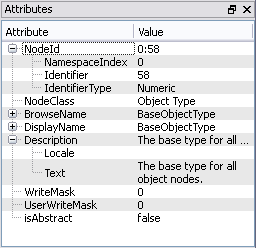
Attributes Window
This window shows the related attributes of the selected item.
Output Window
Status messages are displayed in this window. It indicates success and errors during generation of files or adding/modifying nodes.
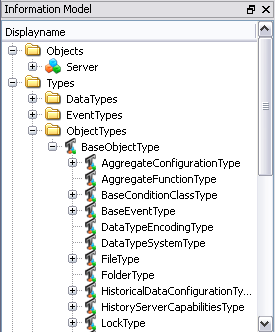
Information Model Window
Here, the aggregated information model is represented as tree view for navigation. Select a node to modify it while in Type View or display a graphical representation of the node while in Graphics View. Use the context menu to add a new type or an instance of an object.
View Window
This window can be used to select the section of the graphical representation of the model to display in the main window while in Graphics View .


